How To Install NetBeans IDE 12 And Java JDK 15 On Windows 10: This guide will take you through the steps on how to download and install NetBeans IDE 12 and Java JDK 15 on Windows 10 computer. If you are new in programming and you want to learn how to develop java programs, this guide is for you. It starts with downloading and install Java JDK 15 on your Windows 10 PC followed by NetBeans IDE 12. Let’s get started.
NOTE: Java JDK 15 only works with 64-bit Operating Systems, so to check if the Windows 10 you are using is 64-bit, “Right click on the Start menu” then select “System” as shown below

How To Install Java JDK 15 On Windows 10 PC
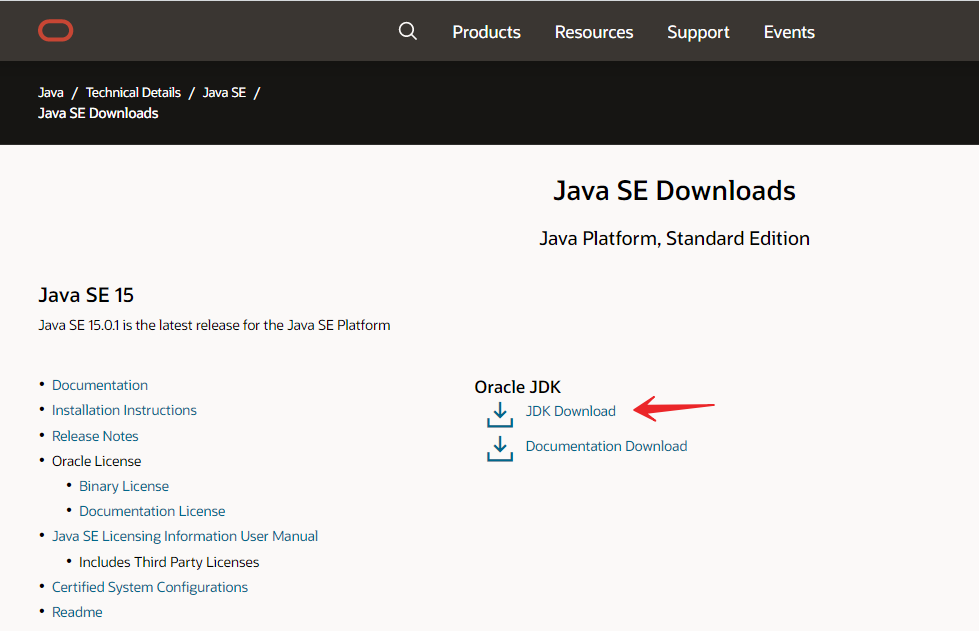
1. Go to Oracle’s official website to download Java JDK 15 setup file. click the download button on the upper left corner.

2. Next, click on the Java JDK 15 download link as shown below. Scroll down to Windows x64 Installer version then click on the download link.

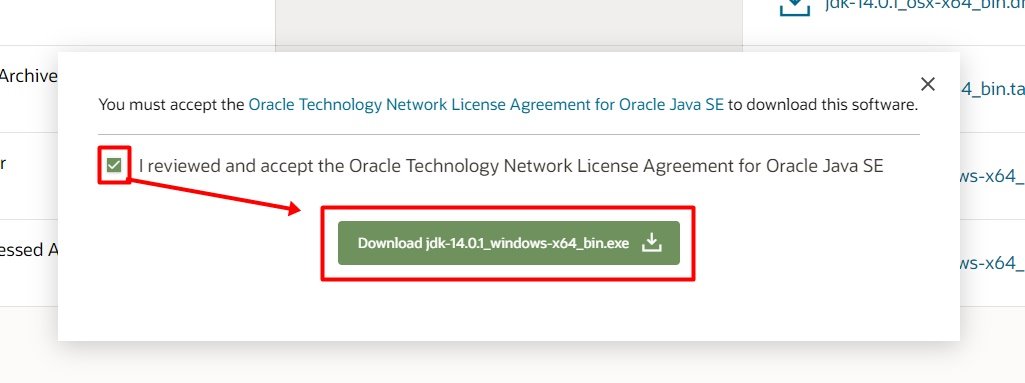
3. Next, you must accept the , then click on the download button.
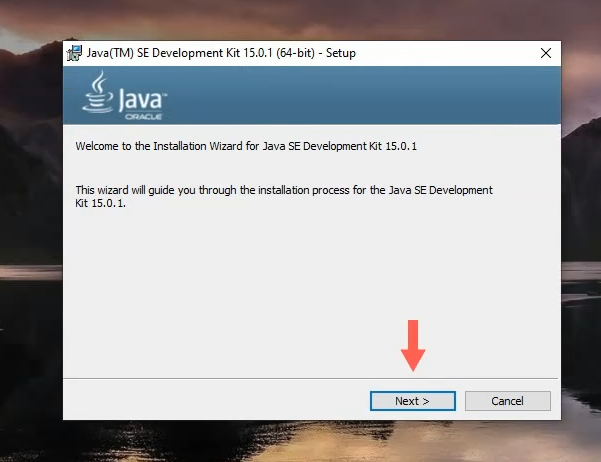
4. Once the download process is complete, locate the Java JDK 15 installer then double click on it to begin the installation process. Click Next on the Java JDK 15 installation wizard.
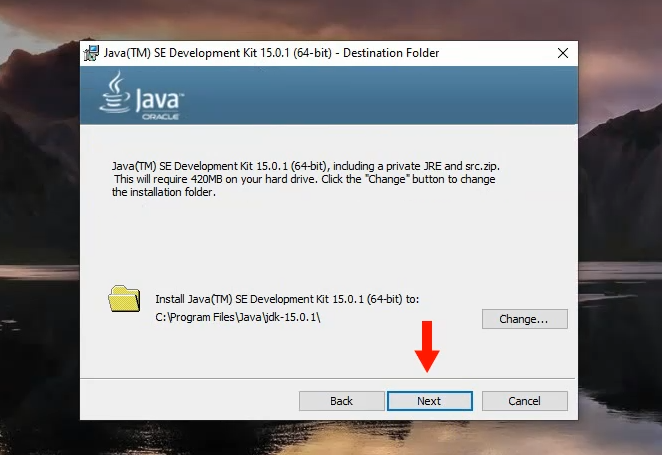
5. Next, you change the location where you want Java JDK 15 to be installed then click on the Next button. if you go with the default settings, it will installed on the following path”C:\Program Files\Java\jdk-15.X.X
6. Give it some few minutes for the installation process to complete.

7. Click on the Close button when JAVA JDK 15 is successfully installed on your Windows PC.

How To Setup Environment Variable For Java JDK 15 On Windows 10
8. Go to Start Screen and type “Control Panel” then hit enter on your keyboard or click on it with your mouse as shown below

9. Next, click on “System and Security”

10. Next, click on “System”

11. Next, click on “Advanced system settings”

12. Next, click on “Environment Variables”
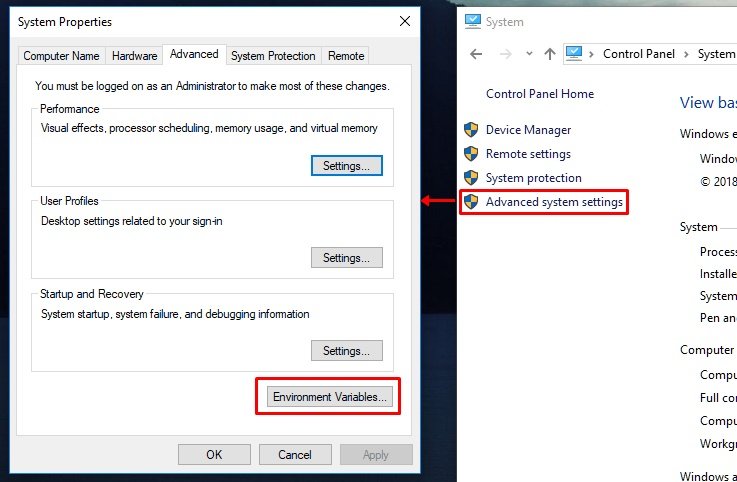
13. Next, under User variables, click on New and type JAVA_HOME on the first line, enter Java JDK directory (C:\Program Files\Java\jdk-15.x.x) on the next line as shown below and then click on the Ok button.
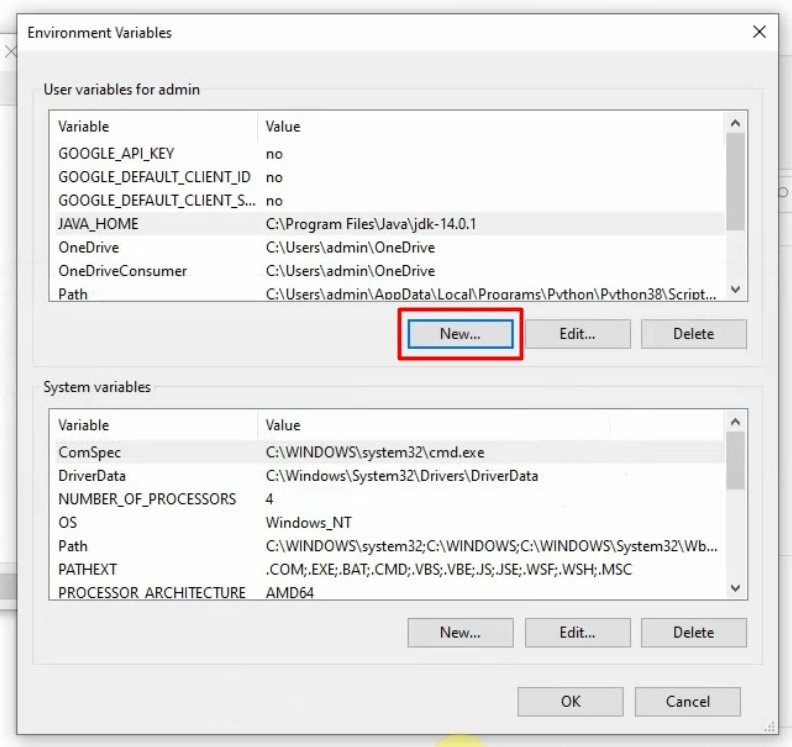
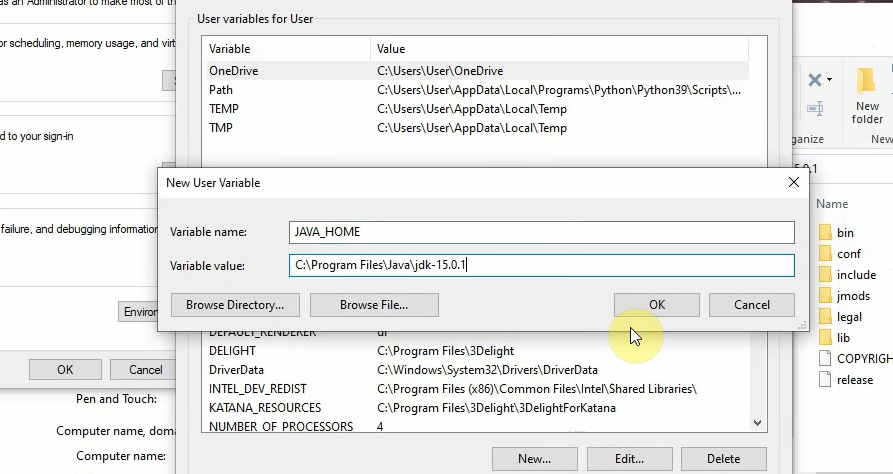
14. Next, under System variables, select path then click on New button as shown below, copy and paste Java 15 bin directory (C:\Program Files\Java\jdk-15.x.x\bin) then click “OK” button on all the popup windows to save the changes


How to check if Java JDK 15 is installed on your Windows 10 PC and it’s working
15. Go to the Start Screen and type “cmd” Next, click on “Command Prompt” as shown below

16. Now, type “javac -version” then hit enter on your keyboard, when it displays the java version installed as javac 15.X.X, then that’s an indication that Java JDK 15 is well installed.

17. To confirm if Java JDK 15 is working, just type “javac” and hit enter on your keyboard. When it loads a list of information as shown below, then Java JDk 15 is working

That is how to you can download and install JAVA JDK 15 on a Windows 10 PC.
Watch the step by step video tutorial below and see all the steps covered on how to install JAVA JDK 15 on your Windows 10 computer.
How To Install NetBeans IDE 12 On Windows 10 PC
Apache NetBeans 12 is the latest version of the IDE. Apache NetBeans can be installed on all operating systems that support Java, i.e, Windows, Linux, Mac OSX and BSD.
Apache NetBeans is more than a text editor. It highlights source code syntactically and semantically, lets you easily refactor code, with a range of handy and powerful tools.
Before you proceed with this guide on how to download and install NetBeans IDE 12 on a Windows 10 PC, you first need to download and install Java JDK on your PC. Follow this link.
How To Download & Install NetBeans IDE 12 On Windows 10 PC
1. Go to https://netbeans.org to download Apache NetBeans 12 then click on the download button as shown below.

2. On the next page, you will see different release versions of NetBeans. Click on the download button under Apache NetBeans 12 as shown below.

3. Click on the Windows version to continue.

4. Next, click on the suggested mirror site to download NetBeans 12 on your Windows 10 PC
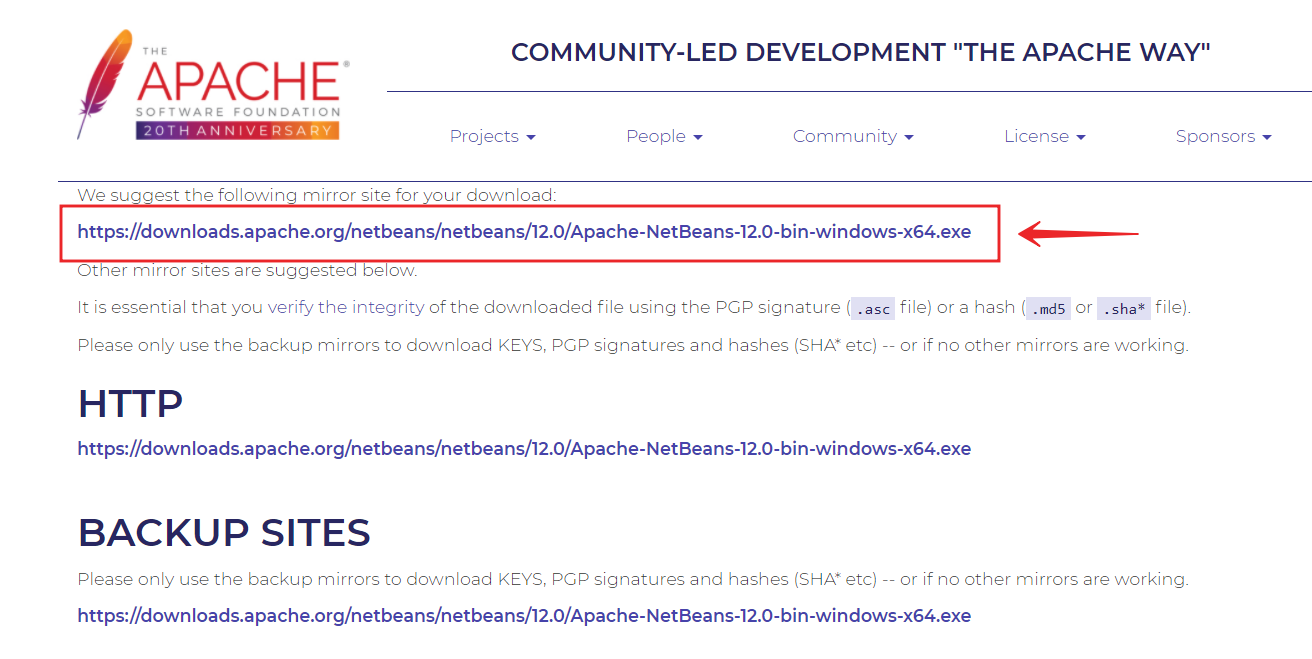
5. Once the download is complete, locate the setup file for NetBeans IDE 12. Next, double click on it to start the installation process.

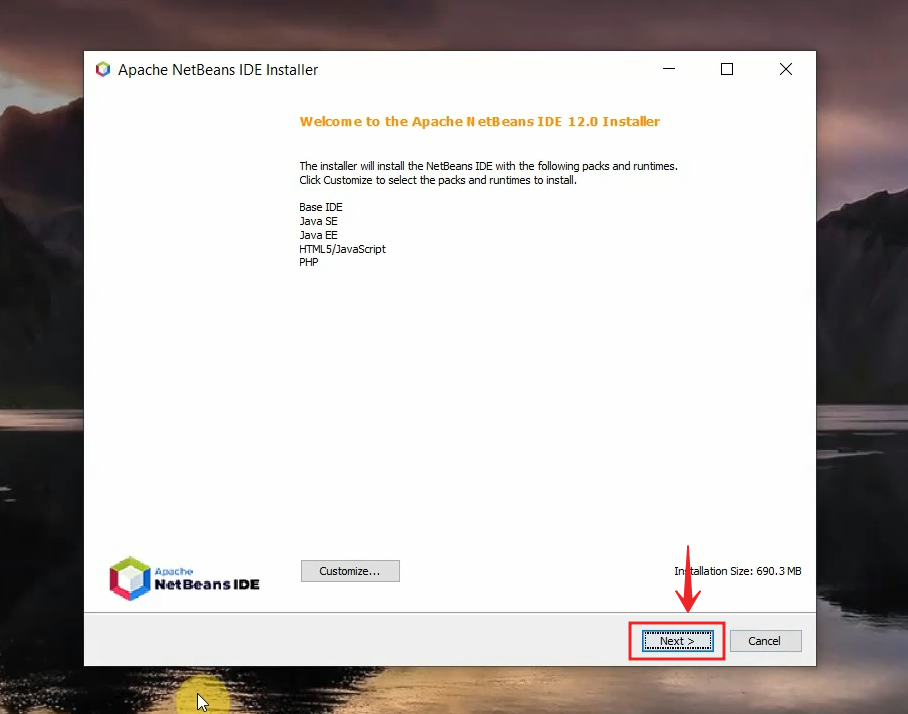
6. Click on Next on the pop-up Apache NetBeans IDE 12 Installer window.
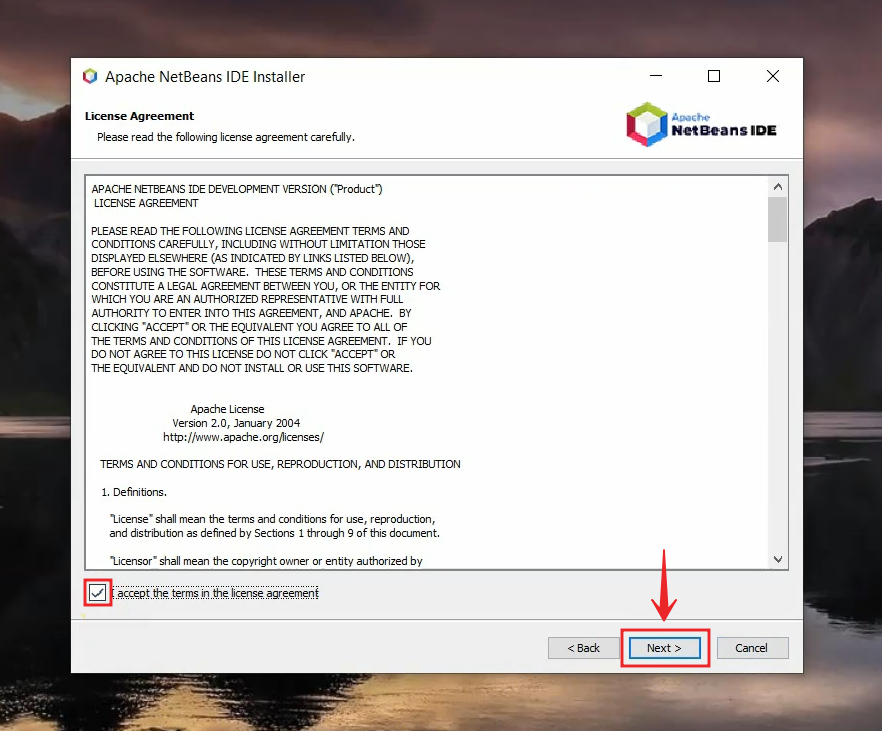
7. Next, accept Apache NetBeans IDE 12 license Agreement and click on Next.
8. Choose the installation folder for NetBeans IDE 12 and the JDK version if you have more than one JDK installed on your PC. Next click on Next to continue.

9. Select “Check for Updates” to allow NetBeans installer to automatically check for updates of installed plugins then click on Install button.

10. Allow enough time for the installation process to complete and once it is done, click on the Finish button.


11. DONE! You can now launch the NetBeans IDE to start working on your new projects.

That is how to download and install NetBeans IDE 12 on a Windows 10 computer.
Watch the step by step video tutorial below to follow closely on how to download and install NetBeans IDE 12 on a Windows 12 PC.
Rate post


Add comment